Top Baking Tips for Quick Breads
As an Amazon Associate, I earn from qualifying purchases. Read the full disclosure here.
Top Baking Tips for Quick Breads! If you’re looking for recipes for quick breads that turn out perfectly every time, you’ve come to the right place!
I must confess, one of my all-time favorite baking obsessions, is baking quick breads! In this post, we will cover the best tips and tricks for baking quick breads quickly and with the results you desire.
Whether you’re a seasoned baker or making your first loaf, these top baking tips will help you whip up delectable loaves of bread without much effort. Are you ready to learn some new hacks? Let’s do this!
Why Are They Called Quick Breads?
They are called “quick” breads because they have to be baked or cooked immediately after being incorporated.
They also are “quick” to prepare, because they aren’t prepared with yeast, which can take hours because of the rising of the dough. Quick breads require chemical leaveners, such as baking powder, baking soda or cream of tartar to help them rise instead.
Why Quick Breads Are Very Versatile
Quick breads are super popular go-to recipes for cooking and baking. These types of recipes involve a unique combination of dry ingredients, wet ingredients, fats, and sugars, making them an incredibly adaptable food option.
Quick breads are not only convenient and easy to prepare, but they also can be easily adjusted to accommodate a variety of dietary restrictions, such as vegan, sugar-free, keto, dairy-free, or gluten-free.
You can take the base ingredients of a quick bread and make different substitutions and get many different variations. And the smell of baking bread…Good God Gertie!! The aroma is enough to make a person drool non-stop, it’s can drive a person crazy!

Tips How to Mix your Ingredients For Excellent Quick Bread
Keep in Mind Before you start – Don’t over mix the batter when combining the dry ingredients with the wet ingredients!
- When combining dry ingredients, (flours, leaveners, salt, and spices) sift them together or mix them thoroughly with a whisk in a bowl.
- When combining wet ingredients, beat together the fat, sugar, and eggs, in a separate bowl, usually in the order the recipe calls out. Then add and stir any other ingredients (such as fruit juices, extracts or flavorings) into the wet ingredients.
- Pour the dry ingredients into the wet ones and fold them together gently by hand, rather than with a mixer.
- By mixing gently, you will get a tender, moist delicious bread.
- The wet and dry ingredients should only be combined until just incorporated, especially when preparing muffins. If you do over mix the batter, you might see large holes and tunnels in the finished product.
- Optional ingredients, fold in nuts, chocolate chips or fruits until just incorporated. NO over-mixing is ‘key’. 🙂 Always remember that!
*Mental Note to Self*—-> Over-mixing will cause holes where the air bubbles escaped and will make the bread tough and texture-wise, not a good thing.
Why Does my Bread Stick to my Pan?
- Did you grease your pan? Always grease the pans before you pour in the batter. The best thing to use for greasing the pan is shortening, because its melting point is higher than any other kind of fat, which helps maintain a “shield” between pan and batter while the bread is baking.
- Use a high-quality cooking spray that won’t bake on to your pans and discolor them, is also a great option.
- You can also line the pan(s) with tin foil and spray them with non-stick cooking spray or place parchment paper in the bottom of your pan, also spraying with non-stick cooking spray.
- Prevent bread sticking to the pan, by removing the bread from the pan sooner, by letting the bread cool for at least twenty minutes in order to set.
- Bundt loaves should cool at least 40 minutes before inverting the pan.
- Muffins should be removed from their pans almost immediately so they don’t get soggy and have condensation. Or just prop them up a bit so air gets to the bottom of the muffins.
Why Does My Bread Have a Crack?
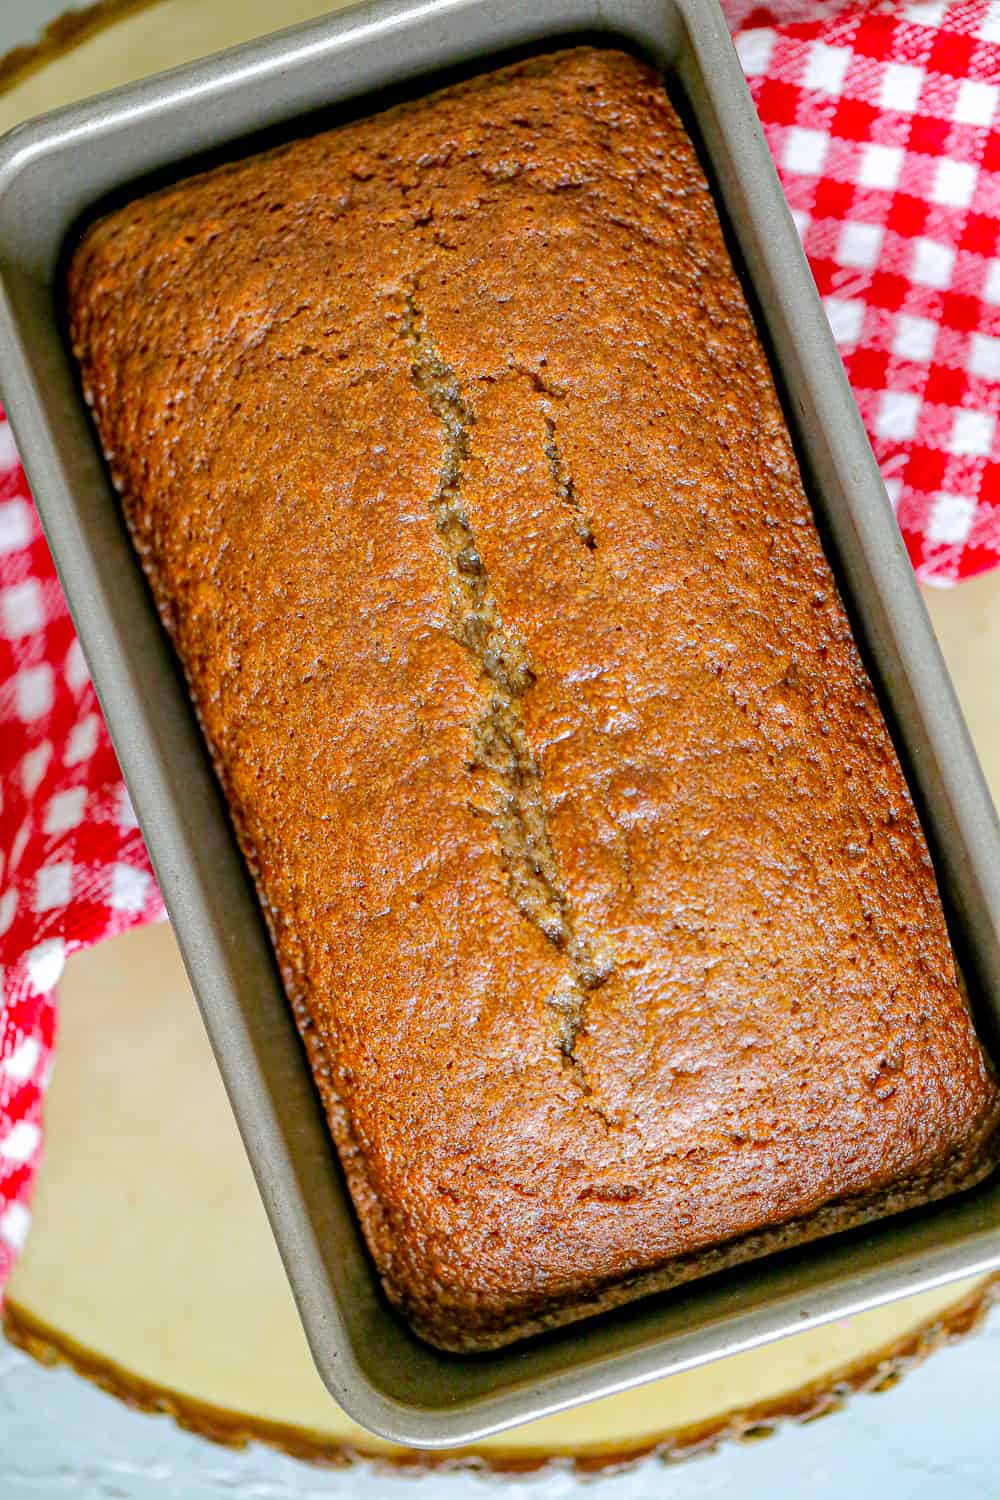
- The crack on top happens when top of the loaf “sets” in the heat of the oven before the bread is finished rising.
- Don’t worry—it’s normal for quick breads. I think it adds character! Drizzle the loaf with icing or sprinkle with confectioners’ sugar if you want to hide your perfect imperfection!

Why Did My Berries Sink to the Bottom of my Loaf?
When making a bread with added ingredients, such as berries, a common issue is that the berries sink to the bottom of the bread during baking. This is likely due to the “sinking syndrome” caused by the high moisture content of the berries.
- If using berries, you can toss the berries with a tablespoon or two of flour (from your recipe) in a ziploc bag or bowl. *Poof* The flour coating magically helps the berries from sinking straight to the bottom of the loaf.
- If you’re using frozen berries, don’t thaw them before using them, otherwise the colors from the fruit will bleed into the batter, unless that’s what you are going for.
Why Is My Bread Still Raw?
The bread looks done on the outside but it’s still raw in the middle of the loaf. This is one of the most common quick bread problems, and it can be caused by a few different factors. The oven temperature could be too high. You can remedy this by buying an oven thermometer to check if you think this might be the issue. They’re cheap and available at most supermarkets.
- Try lowering the oven temperature and/or putting a loose tent of foil over the top of the bread so it won’t burn before the middle, so the middle has time to catch up.
- Another cause of raw issues, could be caused by using a bigger or different pan than the recipe calls for. You can use the same batter to make muffins, mini loaves, jumbo loaves, or round cake loaves. But each different size requires different baking times and some require different baking temperatures.
- The larger and thicker the loaf, the longer it’s going to take to bake. If you’re using a different size pan than your recipe calls for, adjust the baking time accordingly and keep checking the bread often.
- Use a toothpick by poking it in the center of the bread, and if it comes out clean, the bread is done. It can be deceiving by just looking at it, assuming it ‘s done, so the toothpick method is a popular one to use.
- If the texture of your bread is soggy and the middle has sunk, it means there was too much liquid in proportion to the dry ingredients, insufficient leavening, the batter stood too long before baking, or it’s underdone.
- One of the most important reasons your bread is raw, is you didn’t bake it long enough. It looked done, but then when you took it out of the oven, it deflated. I prefer to test the bread by taking my index finger and lightly touching the top most center of the bread. If it’s springy, it’s done. If it deflates any little bit, bake it a few minutes more!
Why is my Bread Dry or Crumbly?
Too little liquid, too much flour, over-mixing and baked too high of a temperature are all reasons your bread could be dry.
- Keep baked goods in an airtight container on the counter or in the fridge. Or wrap individually in plastic wrap, place all in a zip-top bag, and freeze up to one month.
- For fast thawing, you can do so in microwave for 10 to 30 seconds, and for normal thawing approximately 1 & 1/2 hours. Drizzle with glaze while bread is still warm to seal the bread is another way to keep bread from drying out.
- If your bread is dry, you could try mixing a sugared water solution (1:2 ration of 1 cup sugar to 2 cups water) and put the mix in a spray bottle. Poke a few holes in your baked bread and lightly mist the cake with the sugar water mixture. Allow the mist to soak in and repeat as necessary. Don’t mist heavy or your cake will become soggy. You could always go for flavored citrus syrup, a liquor based syrup or add a glaze or frosting to seal in the deal.
- And, as weird as it sounds, you can put your hot bread or cake loaf into the freezer for 30 minutes. It helps it condense and gives it a tender, super, moist texture. So, after the bread is removed from the oven, remove the bread from the pan and then place both bread and the pan it was baked in (with some parchment paper between the bread and pan for removing easily) Place on a rack and then transfer to the freezer.
More Quick Breads Baking Tips
- A coarse texture indicates there is too much fat and leavening in your recipe.
- Adding too much sugar will give you a thick, dark brown crust on your bread.
- Adding too much leavening ingredients like baking powder or baking soda can make your baked goods taste bitter or soapy.
- Loaf cakes can sometimes be challenging because they could get too brown on top before they’re cooked through. To troubleshoot, turn the oven down 25°F and cover the top with a piece of foil or foil tent, or move the cake one rack lower in the oven. Then, watch it carefully until the timer you had it set for, goes off, testing every five minutes or so.
- Without a properly preheated oven, bread will bake inconsistently. The exterior will cook faster than the middle, leaving you with an unattractive, gummy center and a scorched crust. To avoid this scenario, it’s important to start preheating your oven at least 10 minutes before baking.
- Making sure that the batter is in the oven fast enough is key to getting the perfect finished product. Heating the batter too slowly can cause it to lose texture, rising capabilities, and flavor. All of this can lead to a subpar end result.
- For the perfect quick bread, it’s essential to place your oven racks at the right height. Your oven racks should be positioned in the middle of your oven, and no higher than two-thirds of the way up. This will give your loaf ample room to rise while preventing the top from burning. It’s also important to remember that the size of your oven rack will determine the amount of distance between it and the heating elements. If you use a large baking pan, make sure your oven racks provide enough clearance to accommodate it.

How to Make a Recipe for a Basic Quick Bread
For a basic quick bread, use this ratio: 2 parts flour, 2 parts liquid, 1 part egg, and 1 part butter or oil. That’s all you need!
This ratio accounts for the necessary ingredients needed for a basic quick bread. But when you look at a quick bread recipe, it might not look as clear-cut as the ratio above because:
- Leavening is assumed in baking. The leaveners are accounted for in the flour (with 4 ounces of flour to 1 teaspoon baking powder).
- Extras like spices are completely optional and therefore not counted in the ratio.
- Sugar is necessary, but the amount of sugar in many recipes doesn’t necessary affect the final outcome, therefore it is not a part of the ratio. Sugar is often mixed in with the wet ingredients to prevent further gluten formation, but is not considered a wet ingredient.
3 Types of {Dry : Liquid} Batter Ratios that Work Well With Quick Breads
- Drop Batter: This batter has a {dry:liquid} ratio of 3:1, resulting in a moist, but fluffy baked good.
- Pour Batter: This type of batter has a {dry:liquid} ratio of 1:1. Because there is so much liquid in this type of batter, the result will be very moist and dense.
- Stiff Dough: This batter has a {dry:liquid} ratio of 7:1, resulting in a very light and fluffy baked good.
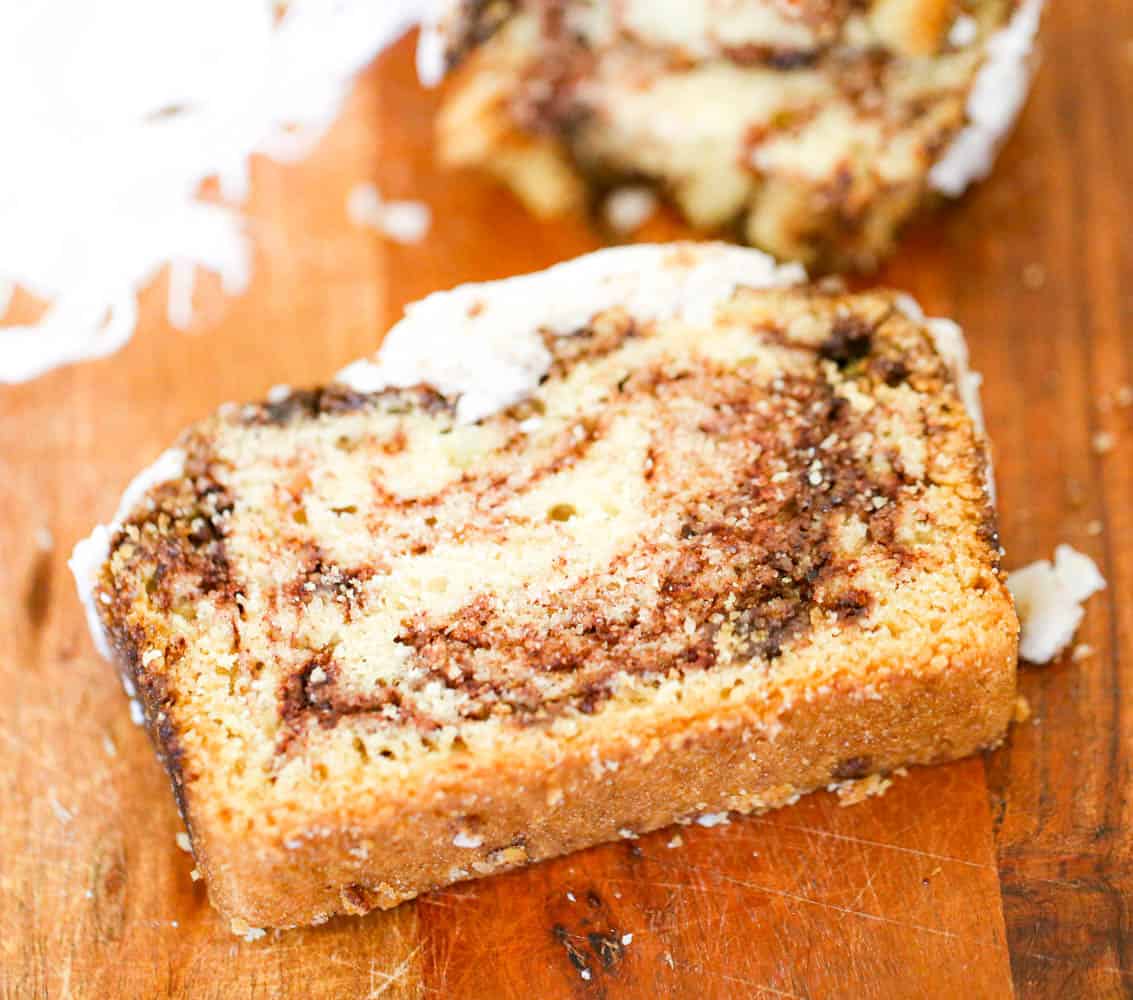
I know these Quick Breads Baking Tips have helped me tremendously over the years! If you have any baking tips, please feel free to post them for others! I’d love to hear them!
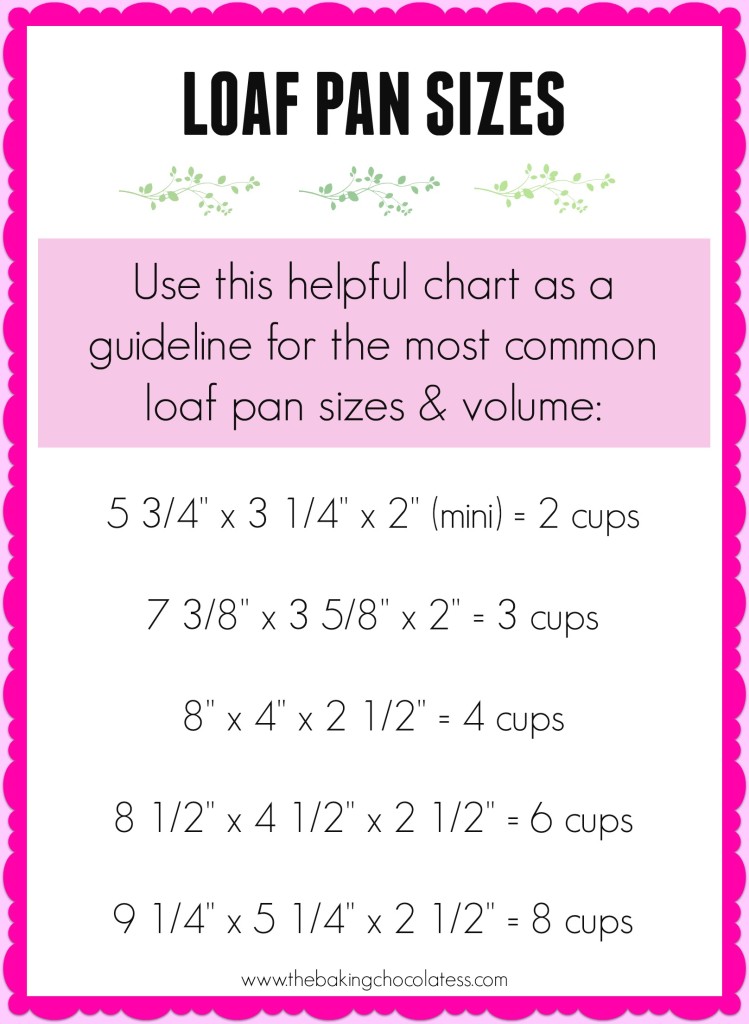
Just in case you need some help with loaf pans…you’re welcome!
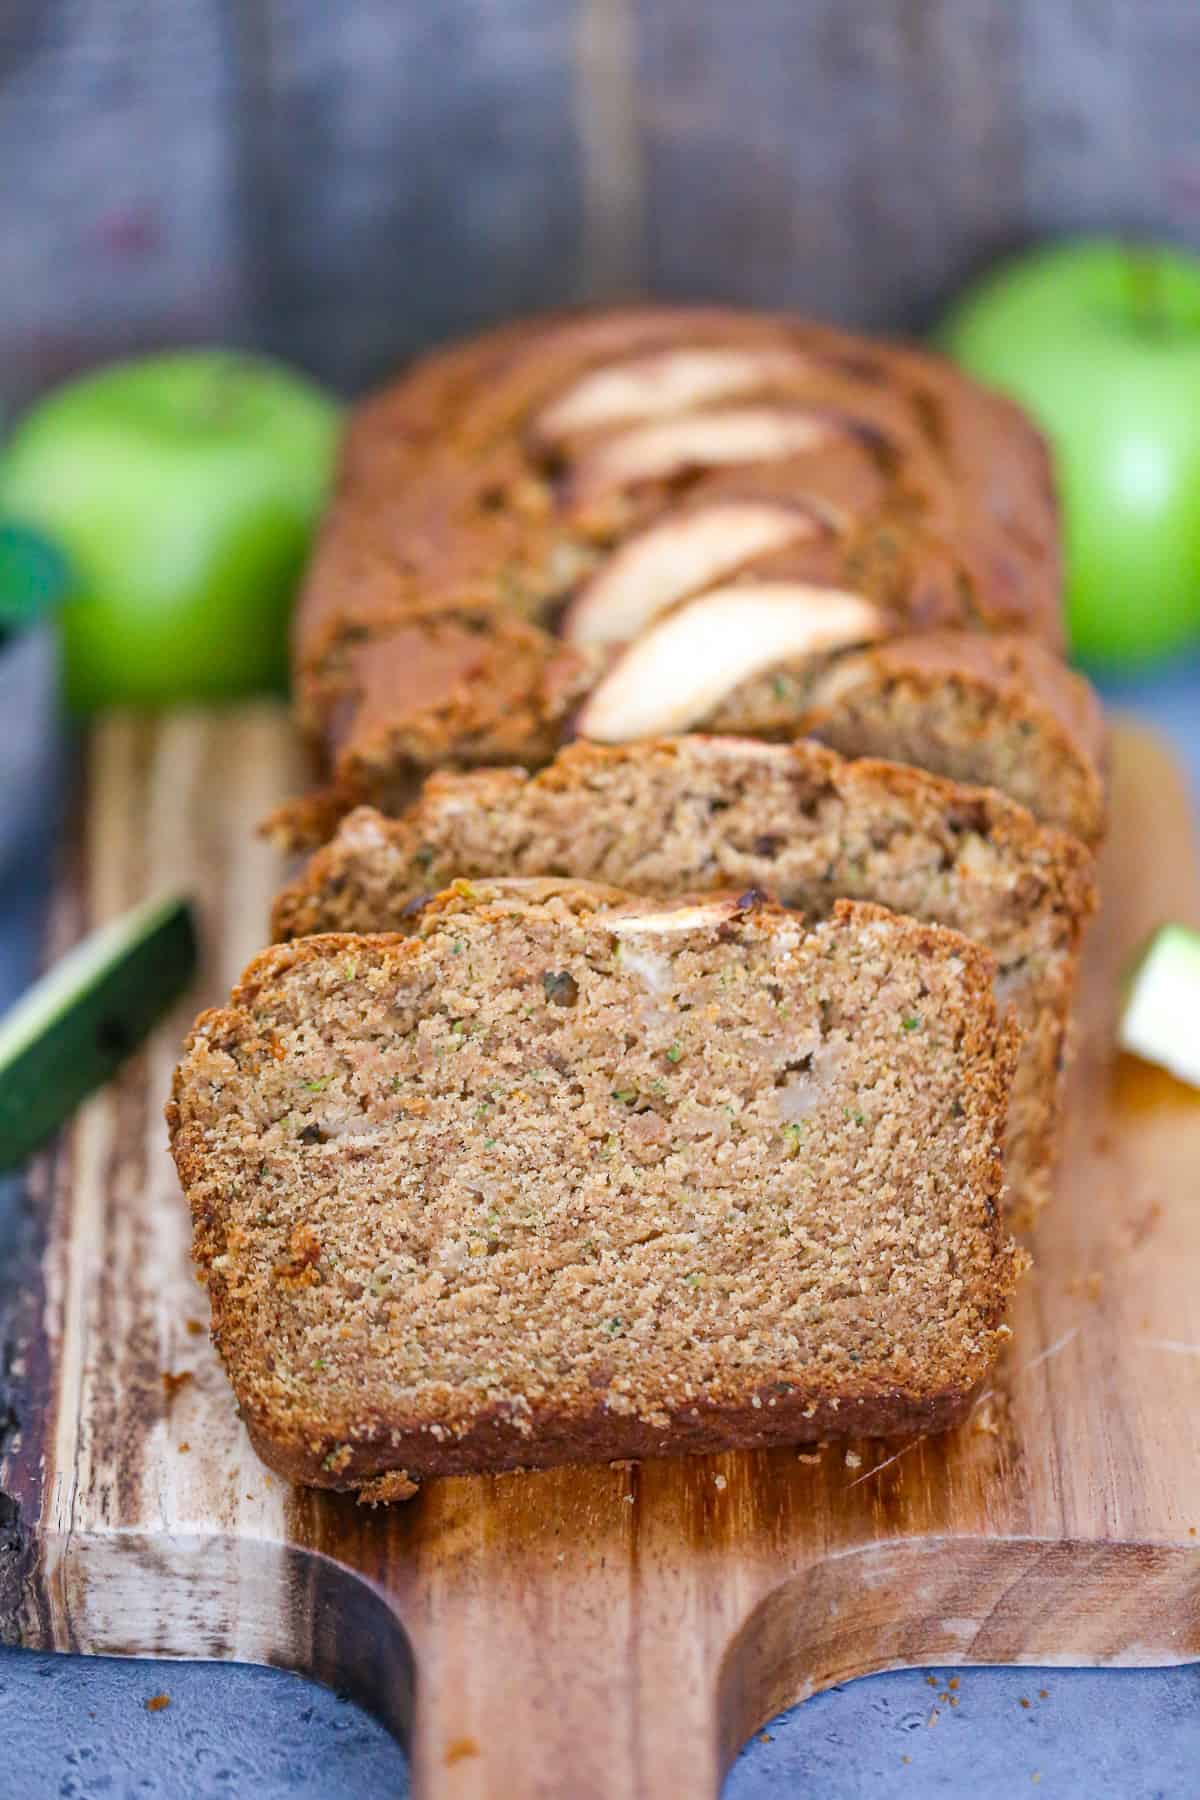
20 Smashing Pumpkin Breads for Fall!
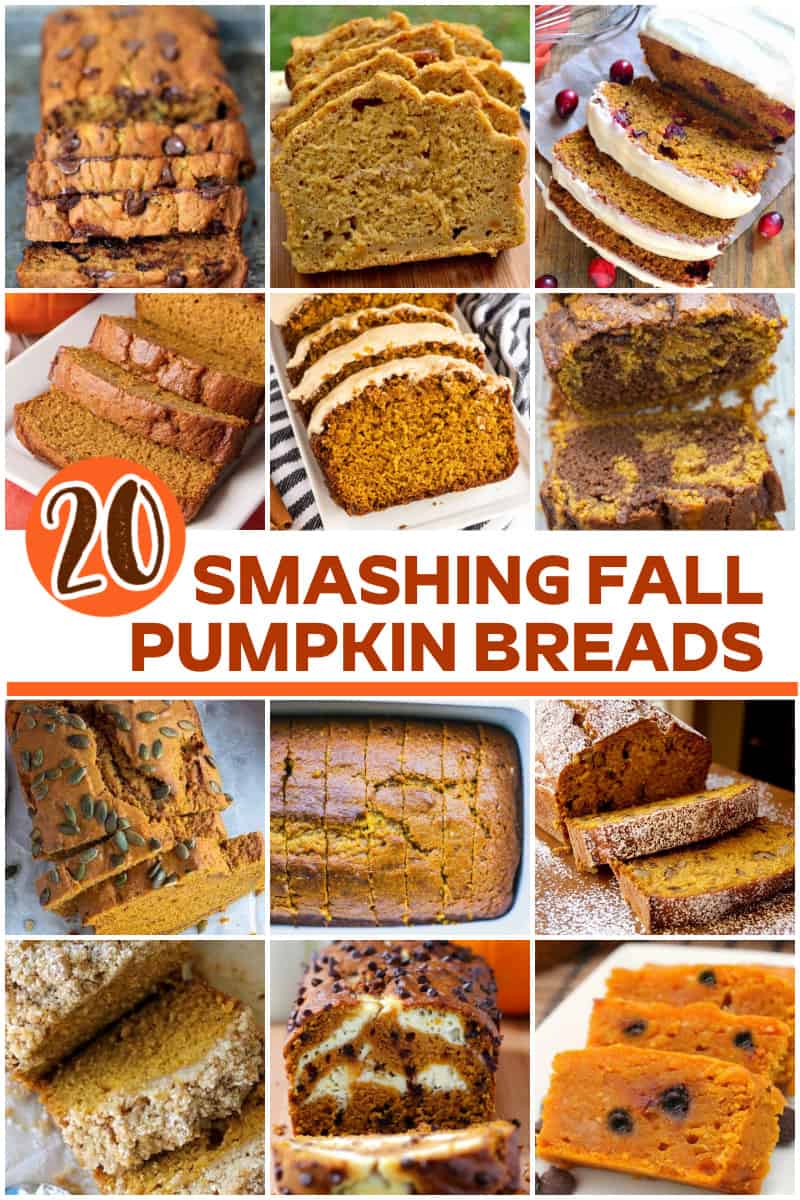
Making quick breads doesn’t have to be an arduous task! With the right ingredients and tools, plus some practice, you can make delicious, fluffy quick breads with ease.
Start by using individual spices to create a flavorful loaf, combine your wet and dry ingredients separately, use a light touch when mixing, and let the batter rest before baking.
You can also bake your quick breads in extra-special ways, like in a Bundt pan or as muffins as well. Quick breads are a fun and creative baking project for everyone. So take the opportunity to get creative and try out different recipes and baking methods to make your own delicious quick breads. Let’s Bake!
Check out all the Quick Breads! YUM!
Want More Tips? Check out these Baking & Tips 101

If the texture of your bread is soggy and the middle has sunk, it means there was too much liquid in proportion to the dry ingredients, insufficient leavening, the batter stood too long before baking, or it’s underdone. Sorry to just get back with you. Hopefully this helps you some? Happy New Year April!
I have a great sherry bread recipe but for some reason this time it turned out so strange, its soggy inside. I’ve never had that happen. The toothpick was dry at the end of baking though. Also, the bread rose but sunk as it cooled. Any ideas why?
Several things could be the culprit.
Could be the pan you are using. You need a thick pan that provides more even heat distribution. Steer clear of dark metal pans because they’ll absorb more heat than light-colored pans. Lower your oven temperature by 25° F when baking in glass or dark-colored metal to compensate for the material if you don’t have a choice.
You should move the rack up one in the oven, maybe it’s too close to the bottom of the oven.
If you don’t preheat, you can get too much heat from the bottom burner and not circulating the heat as it should be causing the bottom to burn before the tops bake.
Oven temperature could be off, check it with an oven thermometer if possible
I like to line pan with parchment paper, lightly spray with non-stick cooking spray for easy removal and to prevent the outsides from overcooking.
If bread has too much sugar, it can cause the bottom to brown faster as well.
Hope 1 or 2 of these tips help you out Olga!
my quick breads are too dark on the bottom and get a crusty ridge, why.?
I had yet another crumbly result this morning with my coconut bread, so I’ve been researching the problem. I use a stand mixer too, and I think that might be it — too much mixing is not good, apparently. Next time I will cream butter and sugar in stand mixer and then do the rest of the mixing by hand.
Are you baking it too low in the oven? If it is too close to the heating element it will develop that hard bottom like that.
I’m so happy to hear that Mary! Thank you for commenting! xo
this was very helpful for me.Thank you.
Hi there, I have this amazing pumpkin spice cake recipe that either comes out perfect or has a dense hard-ish 1/2inch layer at the bottom. It’s fully cooked through but sometime the bottom part stays dense and the rest is light, moist and fluffy.
I always use the same method and ingredients.. any idea what’s going on? Happens in both mini and large loaf pans
I make large batches x4 or x6 of quick breads that have a more cake like texture. However, they always come out crumbly instead of dense. They are moist, just too crumbly. I’ve read that too much baking powder or butter can cause this, but am very careful with the conversions. I’ve also tried substituting oil. Any suggestions? I use a stand mixer. Thank you!
A friend of mine bakes cakes for weddings…She told me that if you open the oven door while baking, the oven temp will drop & so will your cake & so will your cake
I’m not familiar with that recipe, but in general when baking quick breads, it just sounds like it’s not getting baked long enough or there’s too much moisture in the bread. You could also bake at a lower temperature and bake a little longer than the recipe suggests. Hope that helps some? I’ve never heard of pancake bread? It sounds delicious though!
I have made pancake break many times with great success. But the last few times I made the same recipe, the middle sank. Could you tell me why this is happening? I was making Trader Joe’s Pancake Bread (coptcat recipe).
How do I prevent my gluten free bread from cracking on the top I do not use yeast I use baking powder
Wow!!! What a lot of great information!!! I look forward to following you in the future!!!Bethany
Hey Sally! Check your baking soda, could be something is wrong with the leavening with a high baking temperature or not getting it in the oven soon enough, which can cause this reaction. When I bake with baking soda and yogurt or buttermilk combo, I tend to get the bread in the oven quickly. The other thing is too much baking soda, baking powder or a combination. Hope that helps somewhat. 🙂
My quick bread has a ledge around the perimeter, then the middle rises up within this. Any tips to fix? (Cooking in silver nonstick pans at 350.
Thanks,
Sally
Hi! I wound up here per wanting to make the Cuisinart bread machine “carrot cake bread” recipe in a bundt pan baked in the oven. I guess I will just make the 2# version, bake it for 40+ minutes at 350° and hope for the best. The machine will mix it up though! I got that I need to let pan cool for 40 minutes before inverting. Do you have any other advice for those of us wanting to use our bread machine for recipes and mixing? TIA
You are very welcome! Happy Baking!
They are quick breads… and a pain in the gazoo.. lol… thanks for the reply. 🙂
Why is my strawberry bread suddenly developing a “bubbly” side crusty ridge on top?
Heather, I don’t do large batches like you do at work, but it may need more mixing than other breads. Not sure if this is a yeast bread or quick bread, so that may make a difference how much it needs mixed. Just poke the bread with a wooden pick throughout the bread before baking and see if that helps. 🙂
So I have a question… I work in an industrial bakery …. I make 40 5# loaves… of bread almost daily… many work well… I have an issue with my lemon poppy some of the loaves have a large whole in the top center… that goes almost all the way though the loaf… any ideas? if I mix it until just combined… the bottom of the 140 Qt mixer is’t mixed at all.. this mix is much to thick to hand fold..or even really scrape the bottom… because it goes all the way up my arm lol..
Lorna, try hand washing and drying your pans. Or if you use the dishwasher, I would take it out and make sure you dry them with a towel very well. Hopefully that will help. 🙂 Merry Christmas!!
Hi. Some of my metal pans deposit some kind of dark residue on my bread while it cools. My light aluminum pan does not do that. The pans appear to be made from some sort of tin or steel. Not sure. I end up scraping a bit from the bottom and sides of the loaf. Any advice? It seems to occur where there is some condensation. Thank you!
Hi T,
The basic ratio for a quick bread is two parts flour to two parts liquid, to one part egg, to one part butter or oil. For every 5 ounces (about 1 cup) of flour, you will need just scant of a teaspoon of baking powder and a pinch of salt. If you use 10 ounces of all-purpose flour, you’ll add 10 ounces of a liquid like milk, 2 large eggs and 5 ounces of butter, plus two teaspoons of baking powder and about 1/2 teaspoon (or two pinches) of salt plus your add-ins like nuts, chocolate chips and fruits.
All-purpose, bread flour, 1/2 whole-wheat flour and 1/2 all-purpose flour, GF Flour – a good one, self-rising flour is acceptable, if you leave out the other baking powder in your recipe and oatmeal flour. You can find all types of recipes out there using all types of unique flours, if you’re looking for something very specific or different. And sometimes you don’t need flour at all. Hope that helps! 🙂
Hi can you explain the dry:liquid ratios – how to accurately get that measurement? Is this ounce for ounce? I love a moist dense quick bread and not sure how to best achieve that. The cider bread looks so moist and dense.
Also, can you tell me what brand and type of flour works best for this? I typically use all purpose flour but have wonder d if something else may work better.
Thanks Joy! Quick breads are the bomb! 🙂
Great tips and all of your breads looks so good! I love making quick breads too. Thanks for sharing at What’d You Do This Weekend? I hope you will join us again this Monday!
Thank you so much! 🙂 These tips sure do help!
Kim, these look so great! All of the breads/muffins look divine! Thank you for the tips. I still struggle to get my banana bread quite right, but I love quick breads. Pinned!
Thanks Katie! It is awesome!
These look great, I especially love an apple fritter, thanks for sharing!